
How to Subtitle Videos Like a Boss
So maybe you’ve subtitled videos before and it didn’t work out well. Perhaps the subtitles were too small or cropped off in the feed, or changed too quickly to be read comfortably.
Adding subtitles or captions to social video posts is super important for many reasons. However it can be time consuming and sometimes you go to all that effort and then find a problem once you post the video.
With some care and a little bit of planning, whatever captioning app you use you’ll get better results and avoid that sinking feeling of having to go back and edit it all again! It may seem like a lot at first, but it’ll become second nature no time. We’ve also got a handy checklist at the end.
We make our own subtitling app called Captionista that you can download now for free that will help you, but these tips are universal. What matters is that you add subtitles.
Before you record the video
Most importantly, get the composition right.
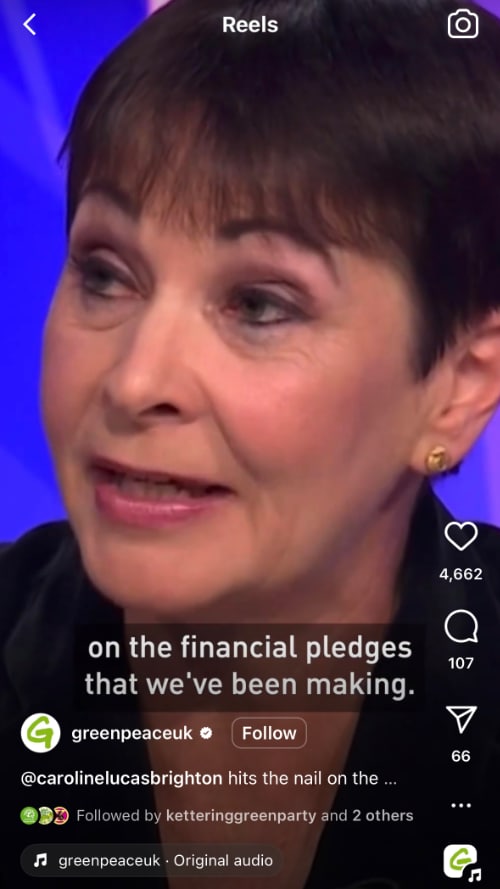
Record in portrait for TikTok & Reels style “talking head” videos. For these videos the captions need to go at the top or middle and slightly to the left to avoid the app UI. If you’re speaking to camera think about where your face will be in relation to the captions to avoid covering your face. A face in the top half of the screen can leave space for captions below or above. The bottom and right is filled with buttons from apps like TikTok.


Sound quality matters
Whether you are using AI or doing it yourself, you need to be able to hear the speech clearly. Clear audio is obviously important for people listening to the video too. Watch out for wind and background noise. Consider getting a cheap wireless lapel mic.
Watch your speed (we love LTNs)!
Speak at a speed similar to a relaxed reading pace, probably a bit slower than your normal rate of speech. People watching the subtitles will have a range of reading speeds and will make it easier for you to time subtitles with this in mind.
So the video is done, but before you add the subtitles…
Video quality is very important
Always start with the highest quality video file that you have. If the file has been sent through services like WhatsApp the quality can be much worse than the original. If you need to get files from another person use a real file transfer service like WeTransfer that sends files “as is”.
Messaging apps like WhatsApp may re-encode videos at low resolution (the number of squares making up the picture horizontally and vertically) or higher compression (giving smaller files but more visible “blocks” and blurry content).
Get the text transcription done first
Have this ready before you start splitting and timing subtitles. It’s a more efficient way to work and you can proofread it. Later you can reuse parts of the transcript for text content accompanying your posts.
Make the speaker look good
Especially so if it’s you! Transcribing speech exactly isn’t the goal — don’t include ums and ahhs, and consider removing accidental repeated words unless it adds authenticity or impact. Subtitles aren’t a precise representation of what is in the audio. Add punctuation to help imply cadence when viewing with the audio off. Subtitles should be considered a well-written version of what was said.
You know the cost of inaction on climate change is going to er cause us ... us all to re-adjust recalibrate and change our way of life whether we want to or not❌
You know, the cost of inaction on climate change is going to cause us all to re-adjust, recalibrate and change our way of life. Whether we want to or not.✅
Think about the subtitle format you want to use
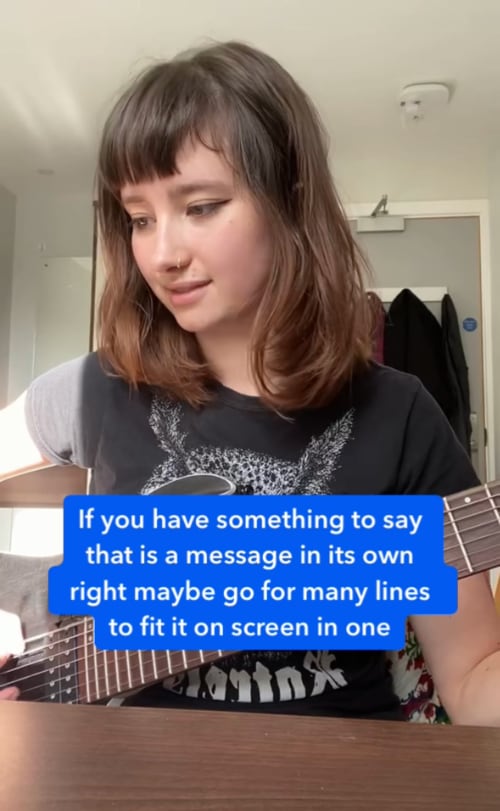
The text size and maximum number of lines affect how you break your subtitles. Changing this later may mean you have to re-work all your timings for good results. Too many lines and you can cover too much of the video subject. Too few and it’s harder to read.

Style the text appropriately for the content
Fonts and colours matter. Serious content shouldn’t be wearing the text equivalent of clown shoes. Fun and informal content can be more colourful and creative.


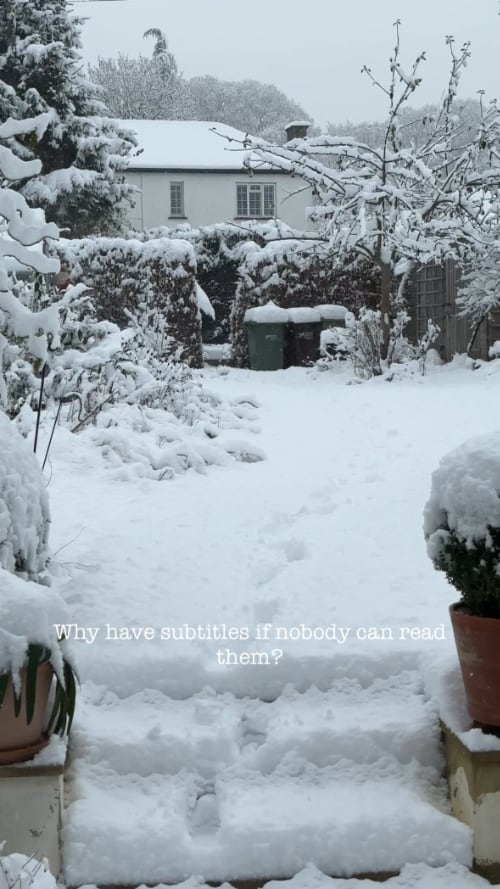
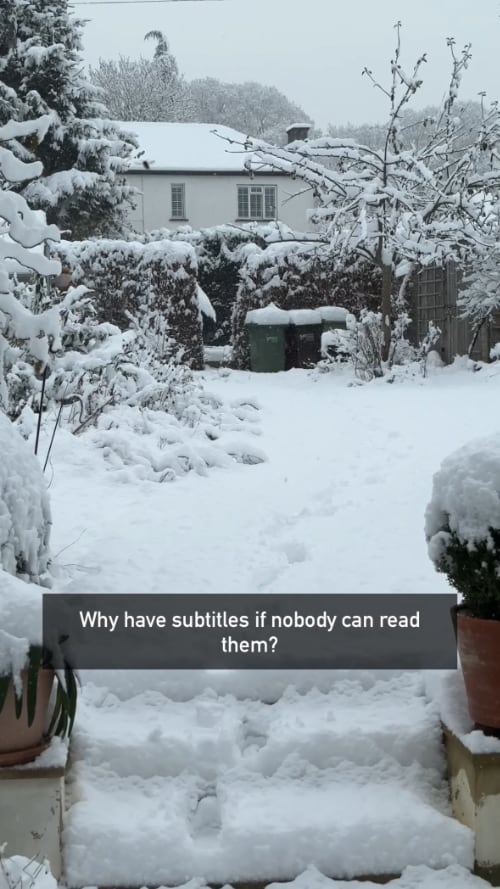
Check the contrast and text size
Make sure the caption text is legible through all parts of your video, using a background if required. Remember that most videos are viewed in a feed on a mobile phone just a few inches across. It’s a good idea to do a very short test of your subtitling and view the video on a phone.
Now you can split & time the captions
Split the subtitle text naturally
Use pauses in speech or sentence clauses where possible. Breaking just where the text will no longer fit on screen can lead to subtitles that do not read well.
Don’t hog the screen
If there are long pauses between speech or there plenty of time to read the text, consider introducing a timing gap between subtitles so the viewer can focus on the content without the text hanging around.
Split subtitles for emotional effect
When a speaker is emphasising words or phrases using timing, you can follow this lead and use timing gaps and shorter subtitles; Read. My. Lips.
👉 Our app Captionista for iPhone and iPad makes this part especially easy and fun, but use whatever works best for you!
Check the options when uploading the final video
Include Closed Captions for accessibility if possible
Closed Captions are used where people have visual challenges and have set up their device to show subtitles over the video with a specific appearance. If your app can export SRT files you can upload these alongside your video with some services like YouTube and Twitter (Media console).
Adding both your own captions to the video itself and uploading an SRT file gives you control over how your captions look for most users, and allows those with special accommodations to make use of those.
First impressions count
Pick the first frame or a poster frame for your video and which subtitle will be when the video first appears in the feed. Some services allow you to pick a cover image, but others use the first frame of the video. In those cases make sure the first subtitle starts immediately so there is a caption immediately in the feed to help draw in viewers.

Checklist (you may want to screenshot this)
Before recording
- Is the composition good?
- Is the sound going to be clear?
- Talk slowly and clearly
Before adding subtitles
- Check the video file’s quality
- Get the transcription ready
- Edit the transcription for clarity
- What caption approach makes sense?
- Is the style appropriate for the content?
- Is style easy to read over all the video?
Adding the captions
- Open Captionista or use whatever app you prefer!
- Split the transcript at natural places
- Add gaps between subtitles during long pauses
- Use gaps and short captions for effect
When uploading
- Upload closed caption SRT files if you can
- Does the “poster frame” selected include a caption?
🙌 Now go and post great videos! Of course we strongly recommend you try our subtitling app called Captionista. It includes a “Pre-flight Check” feature that picks up on a lot of the video issues we mentioned!
We started building our own subtitling app after subtitling a lot of videos for The Green Party in the 2019 UK General Election and we wanted everyone, but especially climate activists, to be able to get more engagement and improve accessibility by captioning videos more easily.
The app is completely free to use with a watermark, so give it a try — you have nothing to lose! There’s also a 3-month free trial of all Pro features available and we give free lifetime Pro subscriptions to activists working to make the world better.